
Users, roles, second factor and API tokens
Every person signs in with a password and a second factor, and the role decides what they may do after that. This guide covers the roles, the second factor, API tokens and the limits that apply to them.
- When to use this
- Roles and permissions
- 1. Sign-in and the second factor
- 2. Add a user
- 3. Add a second admin
- 4. Lost phone, locked out
- 5. API tokens
- Check it worked
- When it fails
- Next steps
When to use this
- You add a colleague and want to give the least role that fits.
- You must set up the second factor for a new user, or replace a lost phone.
- A script needs API access.
- You are the only admin and want a second one, so that one person’s absence does not stop the PKI.
Roles and permissions
A user has roles per tenant, and a role can be limited to one CA. There are three tenant roles and one instance-wide flag.
| Role | May do |
|---|---|
| viewer | Read CAs, certificates and CRL status. Cannot read the audit log. |
| operator | Everything a viewer may, plus issue and renew certificates, revoke certificates, download server-generated keys, request a renewal for an agent deployment, and scan a TLS endpoint that is already entered |
| admin | Everything an operator may, plus manage CAs and upload the offline root’s CRL, change tenant settings, manage agents and the agent enrollment mode, test notifications, manage TLS endpoints, and read the tenant audit log |
| instance admin | A separate flag, not a tenant role: unseal and seal the server, and manage users. It gives no rights inside a tenant. |
The permissions are checked inside the CA engine and the key ring, so the web UI, the API, ACME and the agent cannot bypass them.
Step-up. These actions ask for a fresh second factor even in a signed-in session: revoking a certificate, downloading a key, changing CAs, uploading a CRL, managing users, managing agents, and switching the agent enrollment mode. The confirmation stays valid for 5 minutes by default; an admin chooses 5, 10, 15, 30 or 60 in Administration → Tenant settings (operations guide §4).
1. Sign-in and the second factor
- Password: 12 to 256 characters, checked against a list of common passwords, no composition rules
and no expiry. At
initthe admin password must differ from the unseal passphrase. - Second factor: an authenticator app (TOTP, 6 digits, 30 seconds) is mandatory. Passkeys exist
only through the REST API in this release, and only when
auth.passkey_originis set in the configuration; the web UI has no passkey button. - Recovery codes: ten codes per user, each usable once. Type a recovery code into the same field as the TOTP code. Signing in with one tells you how many are left.
- Lockout: 10 failures lock the account for 15 minutes. Wrong second-factor attempts count like wrong passwords.
- Sessions: a session ends after 30 minutes without use, and after 12 hours at the latest. Changing a user’s roles or disabling the user ends their sessions.
2. Add a user
You need the instance admin flag, and a fresh second factor.
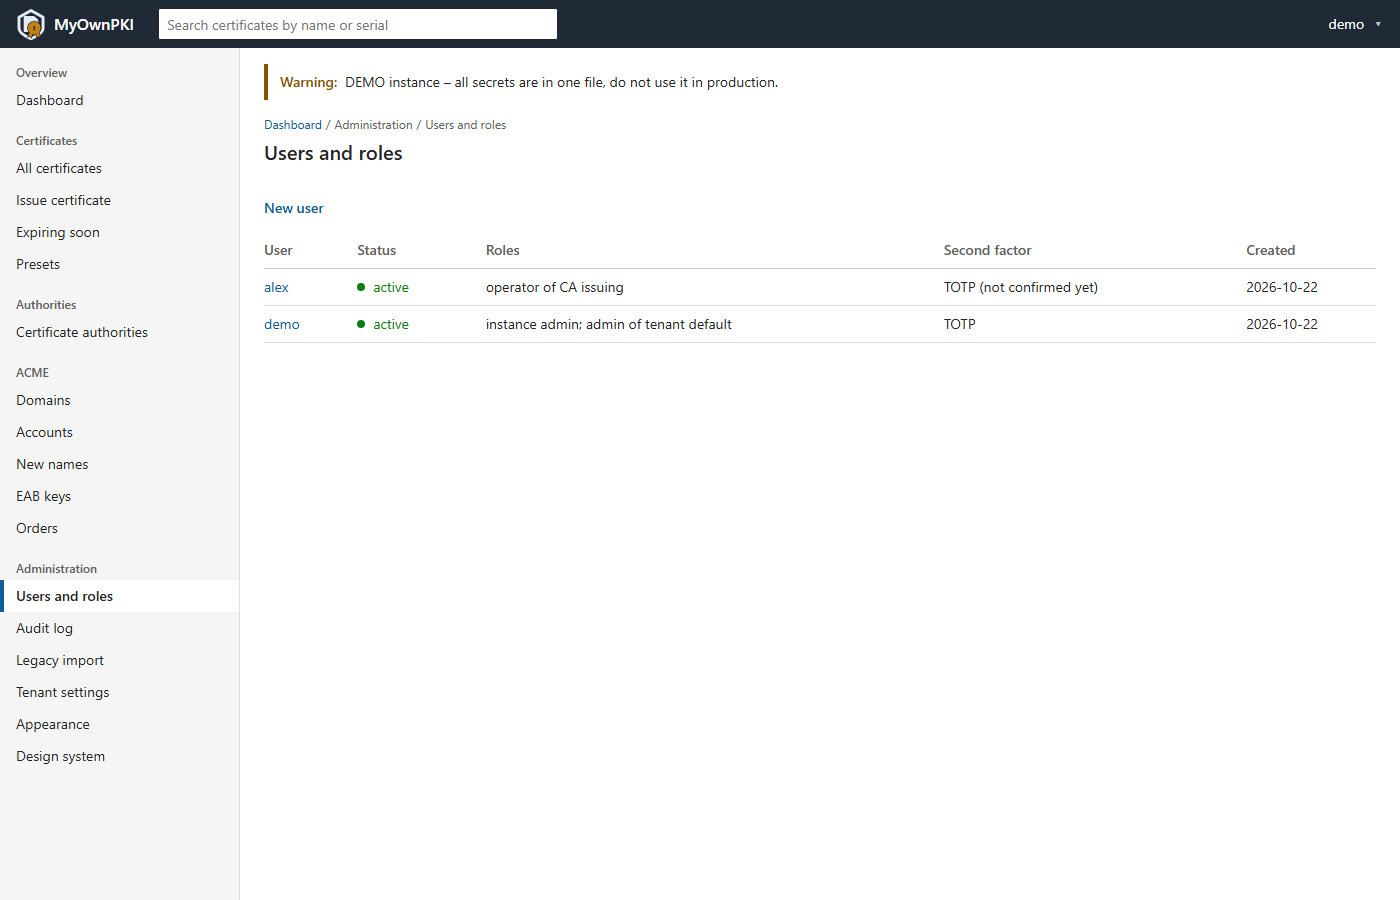
- Open Administration → Users and roles and choose New user.
- Enter a user name (lower case
a-z,0-9,.,_,@,-), an initial password, a role and its scope (the whole tenant, or one CA). - The next page shows the authenticator link, the secret and the recovery codes once. Give them to the user over a channel other than the one that carries the password.
- The user signs in and confirms the secret with a first code. Until then the list says TOTP (not confirmed yet).
Users are never deleted, because their ID is in the audit log. You disable them instead, which ends every session. Nobody can disable themselves, and the last active instance admin and tenant admin always stay.
3. Add a second admin
- Create the user as above with the role admin for the whole tenant.
- Tick Instance admin if this person should also unseal the server and manage users. Roles and the instance flag are independent: the tenant role runs the PKI, the flag runs the server and the users.
- Let them sign in once and confirm the authenticator.
4. Lost phone, locked out
| Situation | What to do |
|---|---|
| The user is locked out | Wait 15 minutes, or an instance admin chooses Unlock now on the user’s page, or myownpki user unlock NAME |
| The phone is lost, recovery codes exist | The user types a recovery code instead of the TOTP code, then makes a new authenticator under My account |
| The phone is lost, no recovery code | At the server: myownpki user reset-2fa NAME. It needs the unseal passphrase, or --recovery-key. The user confirms the new secret at the next sign-in. |
New recovery codes: My account → Recovery codes. The old ones stop working.
5. API tokens
A token is for a script. Sign in, open My account, and under New API token give it a name, a role with its scope and a validity of 1 to 366 days. Creating a token needs a fresh second factor.
- The secret starts with
mop_and is shown once. Only a hash is stored. - A token has at most the roles its owner has, and at most 20 tokens exist per user.
- Use it as
Authorization: Bearer mop_…. Revoke it on the same page; it stops at once. - A token never satisfies the step-up. Whatever its role, it cannot revoke certificates, download
keys, manage CAs, users or agents, change the enrollment mode, or create another token. Such a request
answers
403with the problem typeforbidden.
Give each script its own token with the smallest role. See REST API for the complete list.
Check it worked
- Sign in as the new user in another browser. The instance audit log shows
user.createfor the creation anduser.loginfor the sign-in (The audit log). - The users list shows TOTP instead of not confirmed yet.
- A token works:
curl -sS --cacert root.pem -H "Authorization: Bearer $MYOWNPKI_TOKEN" https://pki.homelab.lan:9443/api/v1/system/status.
When it fails
- “permission denied … needs the role …”: the user lacks that role for that CA or tenant. Give the role on the user’s page; the user must sign in again.
- A page or menu entry is missing: the role does not allow it, for example the audit log for viewers and operators.
- An API call answers
403forbidden: the action needs a person with a fresh second factor. - The code is refused although it looks right: check the time on the server and the phone; codes work once.
- More: Troubleshooting and operations guide §8.
Next steps
- Read what every action leaves behind: The audit log.
- Keep tokens narrow: Best practices.
- Plan for lost secrets: When things go wrong.